It’s just not summer without the sound of the Good Humor truck cruising through the neighborhood. It keeps at a pace that’s just slow enough to grab your money if you hear it in time, yet quick enough to evoke a bit of anxiety in every child so they run out yelling, “STOP!” so as not to miss it.
Along comes the Summer 2013 edition of the Kraft Food & Family magazine and low and behold is the Sundae Cone Cake they have created. As soon as I saw it, I knew we had to try and make this. I love Good Humor’s King Cone – it’s an ice cream sundae in a cone. This “cake” was a big hit here and not that hard to do.
All you need are these ingredients…
…some foil, a big bowl, and a microwave to melt the chocolate.
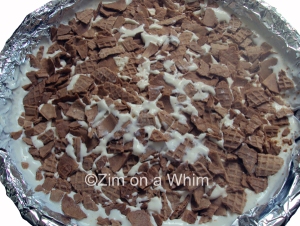
Line a big bowl with some foil, pack in the slightly softened vanilla ice cream, and press some of the cone pieces into it to form a “crust”.
Freeze for about 4 hours, remove from freezer, and unmold onto a plate. Press the rest of the cone pieces into the side of the cake.
Melt the chocolate and stir in the oil. Cool slightly, then drizzle over the top of the cake. Sprinkle with crushed nuts.
And that’s it! A delicious, no-bake dessert that is easier than running after an ice cream truck.
I hope everyone is having a good summer so far!
~Micha
“King Cone” Ice Cream Cake (recipe from Kraft)
Ingredients:
1 tub of vanilla ice cream, slightly softened (1.75 qt.)
6 sugar cones, divided
4 oz. Baker’s Semi-Sweet Chocolate Squares
1 tablespoon oil
1/4 cup chopped dry roasted peanuts
Directions:
1. Using the back of a spoon, pack the softened ice cream into a foil-lined 1-1/2 qt. bowl. Crush 4 sugar cones and place over the ice cream. Press them gently into the ice cream to form a crust. Freeze 4 hours or until firm.
2. Unmold cake into plate. Remove foil. Break up remaining cones into pieces and press them into the side of the cake.
3. Melt the chocolate according to package instructions. (Use medium power and do it in 30 second intervals until melted, stirring after each interval). Stir in the oil and let it cool slightly. Drizzle the chocolate over the top of the cake. Sprinkle with chopped nuts. Serve!
* You can make this ahead of time and store in the freezer for up to 3 days. Before serving, remove from freezer and let stand at room temperature for about 10 minutes to make serving easier.


